![]()
Google Ads Conversion Tracking Shopify: How to Set It Up in 2026
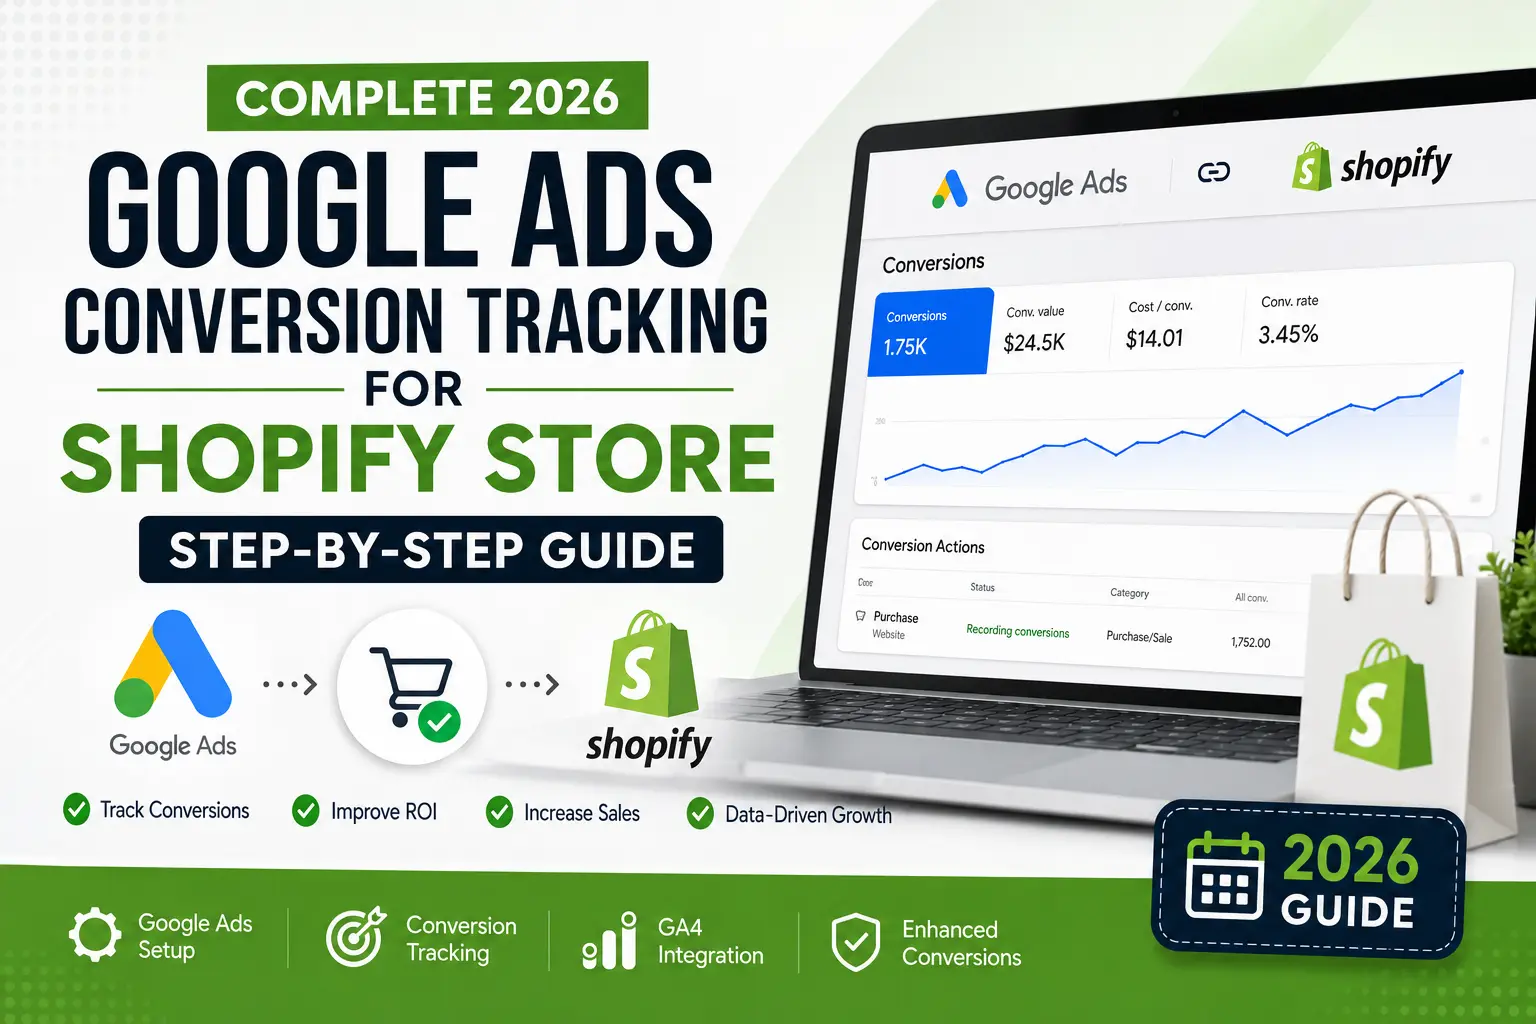
Quick Answer: To set up Google Ads conversion tracking for your Shopify store in 2026, install the Google & YouTube app on Shopify, go to Google Ads → Tools → Data Manager → Shopify → Direct Connection, authorize the link, and verify each conversion action using the Troubleshooting tool. No code needed. Takes under 15 minutes.
Google Ads conversion tracking Shopify setup is essential if you want accurate purchase tracking and better ROAS in 2026.
I have seen this mistake with dozens of store owners. They invest thousands of rupees in Google Ads but purchase tracking is never set up. Then they wonder why their ROAS is so terrible.
I am Kuldeep Singh Rathore, and in this guide I am going to show you step by step exactly how I set up Google Ads conversion tracking for my clients’ Shopify stores. This is 2026’s simplest and most reliable method using the Google & YouTube app with a direct connection to Google Ads. No code. No paid plugins.
Let’s get into it.
How to Set Up Google Ads Conversion Tracking Shopify
Step 1: Install Google & YouTube App on Shopify
Go to your Shopify Admin → Apps → Shopify App Store and install the Google & YouTube app. This official Shopify app allows direct integration with Google Ads without manual code installation or third-party plugins, making conversion tracking setup much easier.
Step 2: Connect Shopify with Google Ads
Open the Google & YouTube app and connect your Google account. Select the correct Google Ads account where you want to track conversions. This connection enables Shopify to send purchase and conversion data directly to your Google Ads campaigns.
Step 3: Authorize Google Ads Data Manager
Inside your Google Ads account, navigate to Tools & Settings → Data Manager → Shopify and approve the direct data connection request. This step securely links Shopify with Google Ads so conversion events like purchases and checkouts can be tracked accurately.
Step 4: Verify Conversion Actions
After connecting Shopify, check your Google Ads account under Goals → Conversions to ensure conversion actions like Purchase, Begin Checkout, or Add to Cart are being created properly. If they appear active, your Shopify Google Ads conversion tracking setup is working correctly.
Step 5: Test Purchase Tracking
Place a test order on your Shopify store and monitor the conversion status in Google Ads using the Troubleshooting section or Google Tag Assistant. Testing confirms that your Google Ads conversion tracking Shopify integration is capturing real purchase data accurately.
Why Google Ads Conversion Tracking is Non-Negotiable for Shopify in 2026
This is not just a “nice to have.” This is the engine behind your ads.
- Without conversion tracking, Google’s algorithm optimises only for clicks not for purchases
- Smart Bidding strategies like Target ROAS and Maximize Conversions become completely useless without real purchase data
- You cannot calculate your actual CPA or ROAS if purchase events are not being tracked
- Google’s algorithm works best when it knows what a “good” user looks like and it learns that only from purchase data
- In 2026, third-party cookies have been largely phased out it is more important than ever that your own first-party data reaches Google
One simple rule to remember: If you are spending even ₹5,000 per month on Google Ads, set up conversion tracking today.
Google Ads in 2026:The Complete Guide to What’s Actually Changing
Real Case Study – A Shopify Store Owner’s Story
A client came to me a fashion accessories Shopify store based in Rajasthan. They had been running Google Ads for 3 months. Budget: ₹25,000 per month. ROAS? 0.8x. Meaning invest ₹100, get ₹80 back.
When I looked at their account, here is what I found:
- Conversion tracking had never been set up
- Google’s campaigns were optimising for clicks not purchases
- A Smart Shopping campaign was running without any purchase signal, it was pulling in random traffic
We set up the direct connection through the Google & YouTube app in one day, verified the purchase tracking, and gave the campaigns 2 weeks to collect data.
Results within 45 days:
- ROAS went from 0.8x to 2.4x
- CPA dropped from ₹890 to ₹340
- Same budget 3x better results
Simply because Google now knew who was actually making a purchase.
What You Need Before Setting Up Shopify Google Ads Conversion Tracking
Keep these things ready before you start:
- Active Google Ads account any plan will work
- Live Shopify store a test store works fine for verification
- Google & YouTube app available free in the Shopify App Store
- Admin access to both accounts Google Ads and Shopify
That is it. No developer needed. No code to write. No paid third-party tools required.
Step 1 – Install the Google & YouTube App in Shopify
First, go to your Shopify store’s admin panel.
- Search for “Google & YouTube” in the top navigation or search bar
- You will find this free app in the Shopify App Store
- Install it
Most store owners already have this installed. If you do not, install it this is Shopify’s official Google integration. This app is what makes the direct connection possible without any manual code.
After installing, keep the Shopify tab open you will need to come back here shortly.
Pro Tip: If you already have an old Google tag installed in your Shopify theme, remove it first. Otherwise you will get duplicate conversions which inflates your data and confuses the algorithm.
Step 2 – How to Open Data Manager in Google Ads
Now switch to your Google Ads account.
- Click on “Tools” in the top navigation
- In the dropdown, find “Data Manager” and click on it
Data Manager is where Google lets you connect all your data sources your CRM, website events, e-commerce platforms everything comes together here.
Once inside Data Manager, find the “Featured Products” section. This shows the platforms that Google officially supports for direct integration.
Step 3 – Select Shopify Direct Connection in Google Ads
Find Shopify in Featured Products and click on it.
You will see three options:
- Direct Connection this is what we are using today
- Shopify Audience
- Third-party integration via Zapier
I always recommend Direct Connection for Shopify stores. Why?
- No middleware data flows straight into Google Ads
- Tracking discrepancies almost never happen with direct connection
- Data delays and mismatches are common problems with Zapier or third-party tools
- Officially supported by both Google and Shopify
Click on “Direct Connection”.
Step 4 – Authorize and Connect Your Shopify Store
After clicking Direct Connection, you will see the “Authorize” button. Click it.
Google will ask for your Shopify store URL/domain. Enter your domain:
- Custom domain:
www.yourstore.com - Or Shopify domain:
yourstore.myshopify.com
After clicking Continue, Google will redirect you to your Shopify store in a new tab. Here, Shopify asks you to confirm that you are giving Google Ads permission to connect.
On the Shopify side, simply click “Connect”.
The page will process for a moment and confirm the connection. You will automatically be redirected back to Google Ads.
Step 5 – Enable Customer Match
Once you are back in Google Ads after authorization, you will see the Customer Match option.
Turn on Customer Match this feature allows Google Ads to use your customer data (email lists, etc.) to build better audiences and find new people who look like your existing buyers.
- In 2026, this feature has become even more powerful
- This is the best use of first-party data
- It works for both remarketing and lookalike audiences
After turning it on, complete the setup.
Step 6 – Check Conversion Actions in Google Ads Goals
Now go to Goals → Summary in your Google Ads account.
You will notice that a new conversion action has been automatically created – it will look something like “Google Shopping App Purchase”. At this point it will show as “Inactive”.
Do not panic this is completely normal.
It shows as Inactive because Google has not yet received any real purchase event. As soon as the first purchase comes in, it will become active.
You will also see these conversion actions:
- Add to Cart when a user adds a product to cart
- Begin Checkout when a user starts the checkout process
- Purchase when an order is completed this is the most important one
But you must verify that tracking is actually working otherwise even after setup, data will not come through.
How I Set Up Google Performance Max Campaigns (Step-by-Step Guide for 2026)
Step 7 – Verify Google Ads Conversion Tracking in Shopify (The Most Critical Step)
This is the step most people skip and then they wonder 2–3 weeks later why conversions are not showing up.
Always verify. This is 10 minutes of work that saves months of blind spending.
Want Expert Help Fixing Your Google Ads Tracking
If your Shopify conversion tracking is inaccurate, your ad data becomes unreliable and that means wasted budget and poor optimization decisions.
How to Verify Purchase Tracking
- In Goals → Summary, find the Purchase conversion action
- Click “Troubleshooting” for that conversion
- Click “Connect” this will redirect you to your Shopify store
- On your store complete an actual purchase (a test product works fine)
- Add to cart → Checkout → Complete the order
- Land on the Thank You / Order Confirmation page
- Go back to Google Ads and check the conversion status
- If it turns green and shows “Conversion action is successfully sending data” you are done. It is working.
How to Verify Add to Cart Tracking
- Click Troubleshooting on the Add to Cart conversion action
- Go to your store add a product to cart
- Proceed to checkout
- Come back it should turn green
How to Verify Begin Checkout Tracking
- Same process go to your store, reach the checkout page, come back and verify
Verify all three separately. Yes, it feels repetitive but those 10 minutes are worth every second.
What Happens After Google Ads Shopify Purchase Data is Connected
Once everything is verified and connected:
- The Inactive conversion actions will start showing recent conversion data
- Google Ads will automatically receive purchase signals from Shopify
- Smart Bidding will now have real data to work with
- You will be able to see which campaigns, ad groups, and keywords are driving actual purchases
Give it 24–48 hours after the first real purchase for data to fully reflect in your account.
Common Mistakes Shopify Store Owners Make – That I See Again and Again
In my 5+ years of experience, here are the mistakes I see repeatedly:
- Not verifying after setup – the connection goes through but no test purchase is made, so tracking stays broken for weeks without anyone noticing
- Using both Google Tag AND the app integration – this causes duplicate conversions, inflates your data, and confuses the algorithm
- Setting the wrong conversion window – for e-commerce I recommend a minimum 30-day click conversion window people rarely buy on their first visit, they browse multiple times
- Not marking Purchase as the Primary Conversion – if Purchase is set as secondary, Smart Bidding will not optimise for it
- Only installing the app and stopping there – the Google & YouTube app alone is not enough — you must complete the Data Manager connection as described above
- Not enabling Enhanced Conversions – in 2026 this has become even more essential after third-party cookies were phased out
Advanced Google Ads Conversion Tips for 2026 – For Shopify Stores
Basic tracking is set up? Let’s go further.
Enable Enhanced Conversions – Essential in 2026
Enhanced Conversions sends hashed first-party data (like buyers’ email addresses) to Google. This helps recover conversions that would otherwise be lost due to cookie restrictions and ad blockers.
In 2026, this is no longer optional – it is essential.
Set Up Conversion Value Rules
If you sell products at different price points, Value Rules tell Google which customer segments are more valuable. For example, customers from a specific city might have a higher average order value Google can optimise for that.
Connect Google Analytics 4 as Well
The Shopify direct connection handles your Google Ads conversion tracking but also connect GA4. GA4 gives you the complete customer journey from the first click all the way through to purchase.
Build Audience Lists from Purchasers
Once purchase data starts flowing in:
- Build a remarketing audience of purchasers
- Exclude them from your prospecting campaigns stop wasting budget on people who already bought
- Use them for upsell and cross-sell campaigns instead
Frequently Asked Questions – Google Ads Conversion Tracking Shopify
Do I need to add any code to my Shopify store for Google Ads conversion tracking?
No. The direct connection method does not require any manual code installation. The Google & YouTube app and Data Manager integration handles everything automatically.
How long does it take for conversion data to appear in Google Ads?
After a verified purchase, it typically takes a few hours to show up in the conversions column. For the account to start optimising based on this data, you generally need a minimum of 30–50 conversions per month per campaign.
My conversion is showing “Inactive” after setup is that a problem?
Inactive simply means Google has not yet received any conversion event. Complete a test purchase and verify using the Troubleshooting method it will activate. If it still shows inactive after a real purchase, check whether the Google & YouTube app is properly connected in Shopify.
Will this method work with a custom domain Shopify store?
Yes, absolutely. When asked for the store URL, enter your custom domain (e.g. www.yourbrand.com). The connection works exactly the same way.
Will this only track online orders or offline purchases too?
This method only tracks online purchase events on your Shopify store. For offline conversions, you would need to set up Offline Conversion Imports separately.
Should I switch from the old Google Tag method?
If you are currently running both the Google Tag and the app integration you most likely have duplicate tracking. I recommend auditing your setup. In most cases, the direct connection method is cleaner. Disable the old tag to avoid data inflation.
Should I use Shopify Audiences as well?
Shopify Audiences is a separate feature that helps build prospecting audiences. It is worth exploring once your conversion tracking is working properly but it is a separate feature from conversion tracking setup.
You can also follow this official Google Ads conversion tracking setup guide for Shopify stores.
Ready to Fix Your Shopify Conversion Tracking?
Proper tracking is the foundation of profitable Google Ads campaigns.
If you’re facing duplicate purchases, missing conversions, inaccurate ROAS, or broken checkout tracking — it’s time to fix it correctly.
Contact Me Today & Fix Your Tracking Setup
Google Ads Conversion Tracking Shopify Setup – Quick Summary
Step by step at a glance:
- Install the Google & YouTube app on your Shopify store
- In Google Ads, go to Tools → Data Manager
- In Featured Products, find Shopify and select Direct Connection
- Click Authorize, enter your store domain, confirm the connection from the Shopify side
- Turn on Customer Match and complete the setup
- Go to Goals → Summary and confirm that the conversion actions have been created
- Use Troubleshooting on each conversion run a live test verify until it turns green
- You are live —Google Ads is now tracking your Shopify purchases
Final Words from Kuldeep Singh Rathore
Conversion tracking is not glamorous work but it is the foundation of every successful Google Ads campaign I have ever run for a Shopify store.
Without it, you are guessing. With it, Google’s algorithm works for you not against you.
When I set this up for my fashion accessories client, I did not add a new budget or create a new campaign I just set up tracking. ROAS went from 0.8x to 2.4x. Same money, same ads just the power of data.
If you get stuck at any step, or if you want me to personally audit your Google Ads setup, reach out directly. I offer one-on-one sessions where we go through your account together and fix whatever is not working.
Drop a comment below
And if this guide helped you, share it with a fellow store owner who is still running blind Google Ads. You might just save their ad budget.
